Grooming White Persians
by Lorraine Saunders, Melanie & Melisa French
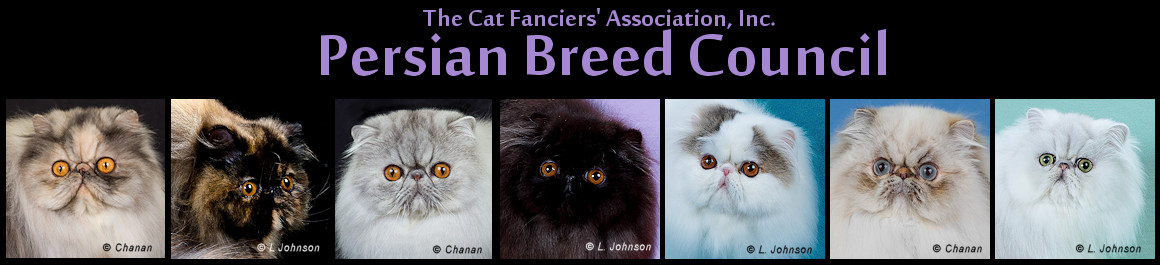
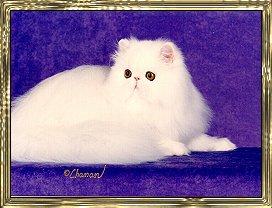
 GC, NW Sundew's Madam La Zonga GC, NW Sundew's Madam La Zonga Copper-Eyed-White Female |
Whether you are an exhibitor, a judge or a cat show visitor, when you see a white Persian, you look forward to their appearance rivaling perfection. From head to toe…. From chest to paws… a pure white coat floating gracefully toward a judging ring should elicit gasps of admiration from all spectators. On the other hand, yellow or (heaven forbid!) brown stains under the eyes or on the ruff, hocks or (ahem!) rear of white Persians usually earns nasty comments from the "peanut gallery."
So, before you jaunt down the road to glory please examine the basics. By learning how to go the limit and learn the right way to groom white Persians, you will be deconstructing fear and fables that have defeated hopeful novices and kept them from owning and exhibiting this most gorgeous of Persian colors. And, remember that it's gotta be fun to get there. Or, it's not worth the trip. (So… when you groom them, love them and enjoy them and you too will be a "white Persian" breeder worthy of renown.)
By the way, the grooming techniques discussed here are practiced by my two friends and myself in our cattery every single day. These techniques were gleaned from many generous and unselfish people who shared their "tools of the trade" with us. We now most gratefully pass them on to you.
Preparation:
Begin at the beginning. Keep litter pans clean. Use flat "chair-sized" bed pads (for incontinent people) which can be purchased through the Web at http://Medshipdirect.com and are called Kendall Tendersorb Disposable Underpads 17.5" x 24" Stock Number: KEN949. However, you can use any brand you like.
You can also purchase "Depends" at your local drug store. (Lay the pads flat in a potty pan and replace them as soon as you see any soil.) Baby paws will remain free of stains if you use something disposable. Plus, disposable bed pads are sanitary and the best way to absorb odor and disease. (And, this is the quickest way to find blood in the urine, or detect worms in the feces.) Next, clean the potty pans with Clorox and water (a capful of Clorox to a pint of water in an old Ivory Liquid plastic bottle) and that will insure that no transmittable diseases are lurking on the inside or outside of the potty box. Replace with a fresh pad as often as necessary.
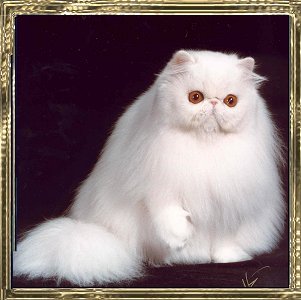
 GC, RW Sundew's Def Leppard GC, RW Sundew's Def LeppardBlue-Eyed-White Male |
Start grooming your baby early. Begin that grooming process the moment you see eye stains appear along with yellowing of ruff, body, paws and rears. Clean baby's eyes every day (see below) and spot clean wherever you observe staining with mini-baths to those areas. Comb their little bodies once a day as well to avoid any baby tangles. Once your kitten is mature enough to play on its own you should give your white kitten its first (of many) baths.
Comb with a Teflon comb (do not use pin brushes!) to preserve coat and prevent tangles and split ends. Do this every day. Make it part of your routine. Your kitten will respond to being groomed and love you all the more for your attentions.
MOST important of all, remember to clean the eyes of your white kitten every single day (at least once a day) . Even if you do NOT observe a dark color coming from the liquid in their eyes. Do NOT drug your kitten with anything to keep tears from flowing and do NOT bleach under the eyes EVER.
Use Boric Acid Liquid to keep the hairs white. Do NOT use regular bleach because it makes the hair shaft of the fur under the eyes extremely porous (and could harm tender baby eyes). Besides if you are cleaning your white Persian's eyes every single day - you won't need to use bleach anyway. Right?
- First wipe the eyes of your kitten with a soft white clean tissue. Dry eyes are easier to deal with.
- Second, pull out some cotton squares and/or beauty sponges. (Beauty sponges are small cotton squares that you get at the drug store or a beauty supply shop.) Tear the small squares in half. Moisten the cotton squares with boric acid liquid.
- Clean each eye - one at a time. Use a cotton square to wipe away any stain. Pick up another square and do the same. When you can see no stain on a cotton square that eye is clean of loose matter. Then go to the next eye. Once you have removed the loose stains AROUND the eyes of your cat/kitten, dry the hair around the eyes gently with another clean tissue. Also, you can use Opticlear (which you can purchase from a reliable pet supply house) or if all else fails - Bausch & Lomb's eye drops for sensitive eyes. These products keep the eyes clean because the liquid in the eyes is prevented from turning brown.
- NOTE: When the weather changes or the winds blow (hot or cold - it doesn't matter) dirt, allergens and pollutants will cause a cat's eyes to become irritated. When that does occur (and it will!) the liquid in the eyes often goes from clear to yellowish brown. It's important to use Gentocin with Durafilm (only if the cat does NOT have and has never had an eye ulcer). Otherwise, use plain Gentocin without Durafilm. The color of the tears from the eyes will go from brown to clear within a few days after using Gentocin. Do NOT over medicate. Once the eye liquid goes back to clear, begin using your regular "allergy" eye drops once again. This way your kitten will not build up an immunity to stronger medications.
Below are necessary tools you will need to make your white kitten a vision of loveliness both at home and in the show hall. NOTE: Observe that where products differ for each type of bath the item has been bolded. See below:
| Conditioning Bath list: | Show Bath list: |
|
|
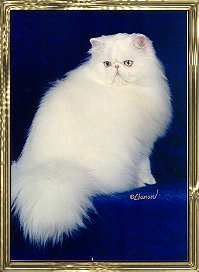
 GC Sundew's Babykins GC Sundew's BabykinsCopper-Eyed-White Female |
Do NOT do a show bath when trying to condition your cat's coat or you will eventually end up with a dry coated practically bald kitten with hair too frizzy to comb. Conditioning baths are a MUST and should never be ignored. If you are willing to condition your kitten and/or white Persian adult before it begins its show career you will have an easy time adapting them to a complete show bath. Further, if you continue to condition the kitten's coat between shows faithfully, you will keep the fur white, full, strong and intact.
Conditioning Bath (this is NOT a Show bath):
Pre-Wash Preparation
- Gently comb the fur with a Teflon comb (never using a pin brush!) prior to the bath. Be gentle and loving with your kitten, as you comb, so that the baby is not traumatized before you begin.)
- Clip the nails prior to placing the kitten in the sink (who wants to be scarred for life?)
Ivory Liquid (mild degreaser)
- Begin the conditioning bath process with Ivory dishwashing liquid. Pour over the entire body (do not dilute) and gently massage into the fur. (Don't use dishwashing detergents such as Dawn because they contain dyes, which can stain a white cat's coat). Ivory removes simple greasy buildup from your kitten's coat. Cover every area, starting at the back of the ears, going under the chin, throughout the entire back, tummy, legs, rear (everything!) with sudsy Ivory. Gently massage.
- When you come to the head, place a small amount of Ivory liquid on your wet hands and rub them together to create a small lather. Carefully wipe the shampoo across the back of the cat’s head (but avoid the facial area, as this is not a tearless shampoo). Do not forget to apply lather to the sides of the head and chin (avoid the eye, nose and cheek areas.)
- To rinse the side of the head by the ears, hold the ear down with your finger and rinse over the back of the ear and the side of the head, holding your attachment close so as not to spray the cat directly in the face. Dry the cat's face with a small hand towel to be sure the eyes and nose remain dry. This keeps the animal calm in the sink as a wet face makes the cat fearful of drowning (no nose holes).
- To rinse the top of the head, hold the head up and rinse the forehead, pushing the water away with your hand to protect the eyes and nose.
- Rinse off all suds until the entire body is clean.
Blue Shampoo (for whitening)
- Use Bubbling Blue made by Prestige (and distributed currently by Pro Vet) as it has a true blue base (not yellow, orange or green). However, you can use whatever blue based shampoo you prefer. Cat Fanciers are fortunate that today we can locate blue-based shampoos through feline supply houses or beauty supply stores.
- Apply your blue shampoo to the wet kitten (do not dilute) adding water and massage as you pour the blue shampoo straight on wet coat. Gently massage into the fur, and build up a lather. Leave it on long enough to suds up the entire kitten. Cover every area (except the face of the kitten), beginning at the back of the ears and under the chin, covering the entire back and tail, tummy, legs, rear (everything!) with this blue shampoo. Please do NOT leave blue shampoo on a white coat as it tends to "gray" the color of white fur if it is left on past a few minutes.
- When you get to the head, place a small amount of blue shampoo on your wet hands and rub them together to create small lather. Carefully wipe the shampoo across the back of the cat’s head (but avoid the facial area as this is not a tearless shampoo). Don’t forget the sides of the head and chin.
- To rinse the side of the head by the ears, hold the ear down with your finger and rinse over the back of the ear and the side of the head, holding your attachment close so as not to spray the cat directly in the face. Dry the cat's face with a small hand towel to be sure the eyes and nose are still dry. This does keep the animal calm in the sink as a wet face makes a cat fearful of drowning (no nose holes).
- To rinse the top of the head, hold the head up and rinse the forehead, pushing the water away with your hand to protect the eyes and nose.
F1R2 Shampoo (for shine and condition)
- Add F1R2 to the wet coat (this is a tearless clear shampoo), pouring it over the body. Gently massage into the fur, adding water as you go to build up a lather.
- When you come to the head and face, carefully wet the face, pushing the wet fur backward with your hands to prevent water from flowing into the cats eyes or nose. Put a small amount of F1R2 onto your wet hands and rub your hands together to create a small lather. Gently wipe the F1R2 onto back of the cat’s head, cheeks and face. Don’t forget the sides of the head and chin. Take an old toothbrush, wet it and gently scrub these areas being careful to avoid the eyes.
- To rinse, hold the head of your attachment right up under the eyes, tilting the head up, so as to not allow the water to flow into the nose and eyes. Hold the head up and rinse the forehead, again pushing the water away with your hand to protect the eyes and nose.
- If the fur under the eyes need to be cleaned, use a wet Kleenex and wipe the fur around the eyes to remove any stain. Keep damp Kleenex handy and continuously change them until they are showing no eye stain. Then carefully wipe off the eyes with a dry tissue.
- To rinse the side of the head by the ears, hold the ear down with your finger and rinse over the back of the ear and the side of the head, holding your attachment close so as not to spray the cat directly in the face. Dry the cat's face with a small hand towel to be sure the eyes and nose are still dry. This keeps the animal calm in the sink as a wet face makes the cat fearful of drowning (no nose holes).
- To rinse the top of the head, hold the head up and rinse the forehead, pushing the water away with your hand to protect the eyes and nose.
- Now that you have rinsed all the shampoo out of the coat, head and face - rinse, rinse, rinse until you see no bubbles and can feel the coat is clean to the touch with no residue anywhere
F1R2 works on all coat colors. And! Although it appears to have a green hue - when diluted it does not stain sparkling white coats. Also! It is tearless!!!
Vinegar Rinse
- Use Heinz white vinegar (or any good organic white vinegar). Put 3 tablespoons into a pitcher and fill with warm water.
- Pour this mixture slowly over the coat, starting behind the ears and work down the body, including the tail. (Avoid the face of the kitten.)
- Rinse well avoiding the eyes.
Heavy Coat Conditioning
- Spread heavy conditioner over the entire kitten's body (avoid the face and eyes). Use Redken Climatress (it's a white cream) paying particular attention to the body itself. Apply Climatress to the ruff, neck, chest, tummy (everything!) on the kitten.
- Wrap the kitten in a towel and hold your baby and talk to him/her for about two to three minutes. Then rinse very thoroughly (always avoid creams near the eyes.)
Final Rinse
In the bottom of a pint sized pitcher, put about a dime-sized amount of Joico Lite cream rinse and fill the pitcher with warm water. Mix well and pour over the coat. Begin behind the ears, etc. Rinse well. You will want to rinse most of this out of the coat. To test that the coat is clean just run your hand over the coat. It should not feel slimy. You will want to leave just enough of the Joico in the coat so that you can run a comb
Blow Drying
- Now it’s dry time! Gently squeeze out as much water out of the coat and legs as possible. Towel dry gently. Do not rub hard. You do not want to damage that precious fur. Gently comb out the cat and unsnag and separate fur very carefully wherever necessary.
- Put your dryer on a warm setting prior to beginning. Remember to use a Teflon comb after you towel dry. Use the wide tooth side while the coat very wet.
- Now that the dryer is ready, carefully introduce it to the kitten. Start at the back of the kitten above the base of the tail on the back and work gently up. Dry while combing lightly and gently using the wide end of the comb. If the cat doesn’t like a particular area, dry somewhere else and return to that spot later. By the time you get to the cat's ruff, chest and head, it will be easier. If the kitten it very nervous, get someone to help. Be sure the kitten doesn’t look directly at the dryer. Only use a warm setting. A hot setting causes kittens to become upset plus you lose too much coat with heat. (NEVER use a box dryer for a show cat). The kitten must always be blown dry by hand or you can look forward to knots and mats.)
- Comb and dry until the kitten has no dampness in the coat. Now, put your kitten in it's cage and let the baby take a nap. He/she deserves it!
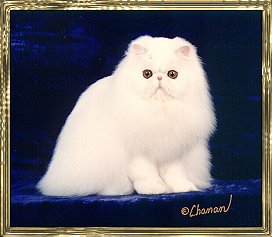
 GC, RW Sundew's Blitzkreig GC, RW Sundew's BlitzkreigCopper-Eyed-White Female |
The Show bath below is similar BUT DIFFERENT and crucially so to the conditioning bath. Please do not leave anything out of this SHOW bath or your white kitten will not be the pretty picture you are trying to create for judges and spectators to admire. I mean it folks. If you don't do a show bath following the proper instructions as given below, don't blame me if your kitten is a gooey stained mess at the show.
Show Bath (this is not a Conditioning bath):
Pre-Wash Preparation
- Gently comb the fur with a Teflon comb (never using a pin brush!) prior to the bath. Be gentle and loving with your kitten, as you comb, so that the baby is not traumatized before you begin.)
- Clip the nails prior to placing the baby in the sink (who needs to be scarred for life?)
- Trim (lightly!) with your double-edged trimming sheers to remove fuzz and odd lengths of hairs across the top of the head to just above the eyes being mindful to avoid long eyebrow hairs wherever possible.
- Gently trim the fuzz from the tips of the ears to make them look smooth and round.
- Trim the eyelashes of the kitten very carefully to create round open eyes.
- Pluck the face inside the whisker pads to create a softly rounded clean look.
- Pluck, do not scissor-cut, beginning at the sides of face to the chin to pull the face forward and create a round, open appearance.
- Finally pluck the tail (at the end of the tail) which will make it look shorter (like a bottle-brush)
Bleaching (by not using harsh bleach)
- Begin the show bath process by preparing a combination of Calcium Carbonate (mixed with 2% hydrogen peroxide and mix together with a spoon to the consistency of toothpaste).
- Smear the mixture gently on a dry coat. Gently massage it in wherever you see stains… rears, necks, feet (anything that looks disturbingly yellow - but keep this thick mixture away from the eyes and "personal areas" on males and females as it does burn sensitive skin. Then "carefully" pull a coffee filter over the head of your kitten and allow your baby to sit in a cage for approximately a half hour to 45 minutes. Keep checking however as you do NOT wish to irritate the cat's skin. Should their flesh look a little pinker than usual - rinse off the mixture with cool (not cold) water right away.
- If the face is very badly stained you can use the mixture - but you must absolutely avoid the eyes at all cost. Apply very carefully to the stained areas. When removing the mixture (under the eyes) be sure you carefully (with a dampened cloth) pull the gunk AWAY from the eyes (downward). Rinse off very gently with lukewarm water (not cold) until all of the Calcium Carbonate mixture is removed from the face.
Degreasing for the show
- Degreasing (Note: degreasers should be clear or white or possibly bluish. Green, orange or yellow tinged degreasers are a disaster when applied to white fur)
- Use a gentle-to-the-skin degreaser (Goop with lanolin NOT pumice is excellent) or if your cat or kitten's skin gets too pink using the Goop. There are many fine pet products that work very effectively. (Warning! Some cats/kittens have an allergic reaction to Goop. Observe their skin and if the flesh around the ears get too pink or the kitten appears to be distressed rinse the Goop off immediately and soap them up to get rid of the Goop's residue).
- Put the kitten in the sink and apply your degreaser to a dry coat, massaging it throughout the coat all the way down to the skin avoiding the face, eyes and insides of ears. Apply liberally and over the entire body. Pay particular attention to the underside, legs and rear end. The tail is always greasy so be sure to get that as well. Work the Goop under the chin, behind the ears, ruff, between the front legs. Then add water so that the mixture is loose and not stiff or you will tear out coat.
- Next add Ivory dishwashing liquid over the watery Goop and gently massage into the fur. (Do not use other Dishwashing detergents such as Dawn because they contain dyes which can stain a white cat's coat). Massage every area, starting from the back of the ears and under the chin, throughout the entire body, tummy, legs, rear (everything!) with this degreaser/Ivory combination.
- When you come to the head, place a small amount of Ivory liquid on your wet hands and rub them together to create a lather. Carefully wipe the lather across the back of the cat’s head (but avoid the facial area as degreasers are not tearless). Don’t forget the sides of the head and chin (avoid the eye, nose, inside of ears and cheek areas.). Do not leave a degreaser on any longer than it takes to apply it to the body. Rinse it off as soon as you cover the entire kitten.
- To rinse the side of the head by the ears, hold the ear down with your finger and rinse over the back of the ear and the side of the head, holding your attachment close so as not to spray the cat directly in the face. Dry the cat's face with a small hand towel to be sure the eyes and nose remain dry. This keeps the animal calm in the sink. A wet face makes the cat fearful of drowning (no nose holes).
- To rinse the top of the head, tilt the head up and rinse the forehead, pushing the water back and away with your hand to protect the eyes and nose.
Blue Shampoo (for whitening)
- Use Bubbling Blue made by Prestige (and distributed currently by Pro Vet) as it has a true blue base (not yellow, orange or green). However, you can use whatever blue based shampoo you prefer. Cat Fanciers are fortunate that today we can locate blue-based shampoos through feline supply houses or beauty supply stores.
- Apply your blue shampoo to the wet kitten (do not dilute) adding water and massage as you pour the blue shampoo straight on wet coat. Gently massage into the fur, and build up a lather. Leave it on long enough to suds up the entire kitten. Cover every area (except the face of the kitten), beginning at the back of the ears and under the chin, covering the entire back and tail, tummy, legs, rear (everything!) with this blue shampoo. Please do NOT leave blue shampoo on a white coat as it tends to "gray" the color of white fur if it is left on past a few minutes.
- When you come to the head, place a small amount of blue shampoo on your wet hands and rub them together to create small lather. Carefully wipe the shampoo across the back of the cat’s head (but avoid the facial area as this is not a tearless shampoo). Don’t forget the sides of the head and chin.
- To rinse the side of the head by the ears, hold the ear down with your finger and rinse over the back of the ear and the side of the head, holding your attachment close so as not to spray the cat directly in the face. Dry the cat's face with a small hand towel to be sure the eyes and nose are still dry. This does keep the animal calm in the sink as a wet face makes a cat fearful of drowning (no nose holes).
- To rinse the top of the head, hold the head up and rinse the forehead, pushing the water away with your hand to protect the eyes and nose.
F1R2 Shampoo (for shine and condition)
- Add F1R2 to the wet coat (this is a tearless clear shampoo), pouring it over the body. Gently massage into the fur, adding water as you go to build up a lather.
- When you come to the head and face, carefully wet the face, pushing the wet fur backward with your hands to prevent water from flowing into the cats eyes or nose. Put a small amount of F1R2 onto your wet hands and rub your hands together to create a small lather. Gently wipe the F1R2 onto back of the cat’s head, cheeks and face. Don’t forget the sides of the head and chin. Take an old toothbrush, wet it and gently scrub these areas being careful to avoid the eyes.
- To rinse, hold the head of your attachment right up under the eyes, tilting the head up, so as to not allow the water to flow into the nose and eyes. Hold the head up and rinse the forehead, again pushing the water away with your hand to protect the eyes and nose.
- If the fur under the eyes need to be cleaned, use a wet Kleenex and wipe the fur around the eyes to remove any stain. Keep damp Kleenex handy and continuously change them until they are showing no eye stain. Then carefully wipe off the eyes with a dry tissue.
- To rinse the side of the head by the ears, hold the ear down with your finger and rinse over the back of the ear and the side of the head, holding your attachment close so as not to spray the cat directly in the face. Dry the cat's face with a small hand towel to be sure the eyes and nose are still dry. This keeps the animal calm in the sink as a wet face makes the cat fearful of drowning (no nose holes).
- To rinse the top of the head, hold the head up and rinse the forehead, pushing the water away with your hand to protect the eyes and nose.
- Now that you have rinsed all the shampoo out of the coat, head and face - rinse, rinse, rinse until you see no bubbles and can feel the coat is clean to the touch with no residue anywhere.
F1R2 works on all coat colors. And! Although it appears to have a green hue - when diluted it does not stain sparkling white coats. Also! It is tearless!!!
Vinegar Rinse
- Use Heinz white vinegar (or any good organic white vinegar). Put 3 tablespoons into a pitcher and fill with warm water.
- Pour this mixture slowly over the coat, starting behind the ears and work down the body, including the tail. (Avoid the face of the kitten.)
- Rinse well avoiding the eyes.
Final Rinse
In the bottom of a pint sized pitcher put about a dime-sized amount of Joico Lite cream rinse and fill the pitcher with warm water. Mix well and pour over the coat. Again, starting behind the ears, etc. Rinse well. You will want to rinse the Joico out of the coat. To test that the coat is clean just run your hand over the coat. It should not feel slimy. You will want to leave just enough of the Joico in the coat so that you can run a comb through it without a lot tread. That way you will not pull out unnecessary coat.
Blow Drying
- Now it’s dry time! Gently squeeze out as much water out of the coat and legs as possible. Dry gently with a towel. Don’t rub hard, as you don’t want to damage that precious fur. Gently comb out the cat and remove snags and separate fur very carefully wherever necessary.
- Turn on your dryer on the warm setting prior to towel drying and either spray the cat with a liquid mousse or apply a golf ball sized amount of creamy mousse to the entire coat. Apply over the cat’s body, neck, behind the ears, back, underside, legs, back of the legs, rear end and tail. (Avoid the face!) Take your time and go slowly. Wipe off the excess mousse and/or spray gel with a towel. Less gel or spray is better than more as your cat will be a sticky glue ball if you leave too much on the fur. If you do leave too much mousse or gel on the fur, your comb will catch coat during the drying process and you will lose precious hair. You want the comb to glide gracefully through the coat. Remember to use a Teflon comb with the wide tooth side when the coat is very wet.
- Your dryer is ready. Carefully introduce it to the kitten by starting at the rear of the cat. Dry while combing lightly and gently using the wide end of the comb. If the cat doesn’t like a particular area, dry somewhere else and return to that spot later. By the time you get to the cat's head, it will be easier. If the kitten is nervous, get someone to help you so the kitten doesn’t look directly at the dryer. Only use the warm setting. The hot setting will cause the kitten to lose too much fur. (NEVER use a box dryer for a show cat. The coat must always be hand dried and combed out meticulously or you can look forward to a curly coat and quite a bit of embarrassment when your cat looks rumpled in the ring.)
- Remember: Comb and dry until the kitten has no dampness in the coat. Use the finer end of the comb to refine the look of the coat.
- Take two paper coffee filters. Fold them separately in half and (by hand) shred the center part two ways to make a hole in the center (do not cut with a scissor as that will sheer the ruff). Pull each one separately over the head of your kitten to prevent water and food from staining that sparking white ruff.
- Place your kitten lovingly in a freshly cleaned cage with nice soft bed. You should give the kitten some kind words, a pet or two and fresh food and water before saying "goodnight"
At the Cat Show...
Kitten or adult, if all has gone well, your white Persian will be gorgeous. I know all this sounds challenging, but as you get into it, everything will become routine and the results will be worthwhile. Besides you do get hooked on all the nice compliments.
Of course you should bring powders and light moistening sprays to every cat show along with combs and eye washes to be sure that before this special kitten is presented in each ring it is the absolute epitome of perfection.
Best wishes and good luck. You are exhibiting the prettiest cat in CFA, your impeccably groomed white Persian.
 Sundew's Flora Temple (left) Sundew's Flora Temple (left)Copper-Eyed-White Female CH Sundew's Aura Temple (right) Odd-Eyed-White Female |